CRU – Unlock Hidden Resolutions & Refresh Rates on Any Monitor
Have you ever looked at your monitor’s refresh rate options and wondered, “Why can’t I go higher?” Maybe you know your display is capable of 75 Hz, but Windows only shows 60 Hz. Or perhaps you want to run a non-standard resolution like 1440×1080 for competitive gaming. The default graphics drivers often hide these possibilities. That is where the Custom Resolution Utility (CRU) comes in.
CRU is a small, free, and incredibly powerful tool that gives you direct access to your monitor’s EDID (Extended Display Identification Data). Think of EDID as your monitor’s ID card—it tells your graphics card what resolutions and refresh rates it supports. CRU lets you edit that ID card.
With this utility, you can add custom resolutions, remove unwanted ones, adjust FreeSync ranges, and even overclock your monitor to achieve higher refresh rates than the manufacturer officially supports . It works with AMD, NVIDIA, and even many Intel GPUs .
Software Overview
Custom Resolution Utility (CRU) is a freeware EDID editor developed by a programmer known as ToastyX . The current stable version is 1.5.3, released in April 2025, and the developer is actively working on a major update (CRU 2.0) with a redesigned interface .
Unlike traditional graphics card control panels that limit you to a set of “approved” resolutions, CRU works at a deeper level. It creates software-based EDID overrides in the Windows Registry . This means you are not modifying the physical monitor hardware. Everything is reversible. If something goes wrong, a simple reset returns your system to normal.
CRU is a portable application. It does not require installation. You download a ZIP file, extract it, and run the executable. This makes it easy to carry on a USB stick or use without leaving traces on a computer.
The primary use cases for CRU include:
- Monitor Overclocking: Pushing your monitor’s refresh rate beyond its advertised limit (e.g., running a 60 Hz panel at 75 Hz or 144 Hz panel at 165 Hz).
- Adding Custom Resolutions: Creating resolutions not natively supported, such as 1728×1080 (a popular choice for stretched aspect ratio in competitive shooters) .
- Removing Unwanted Resolutions: Cleaning up the list of resolutions in your display settings by deleting those you never use.
- Editing FreeSync / G-SYNC Ranges: Adjusting the Variable Refresh Rate (VRR) range to potentially reduce flickering or improve compatibility .
- Fixing Driver Issues: Forcing specific display modes when the graphics driver misidentifies your monitor’s capabilities .
Main Features with Detailed Descriptions
1. EDID Editing & Custom Resolution Creation
The core function of CRU is allowing you to add display modes that do not exist in the default EDID. You can specify the horizontal and vertical resolution and, most importantly, the refresh rate.
When adding a resolution, you can choose from several timing standards:
- Automatic – LCD standard: Best for most modern monitors. It uses standard parameters common to LCD panels.
- Automatic – LCD Reduced (CVT-RB): Reduces the pixel clock by minimizing blanking intervals. This is often necessary when trying to achieve very high refresh rates within bandwidth limits.
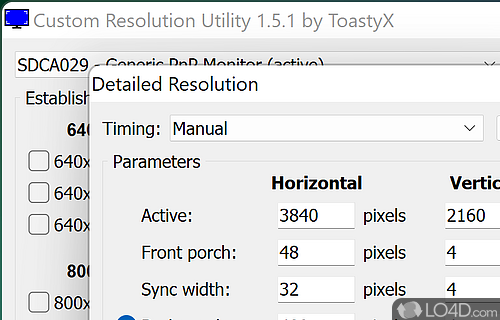
- Manual: For experts only. Allows you to tweak every single timing parameter (front porch, sync width, back porch, etc.) to squeeze every last MHz out of your connection .
CRU also respects pixel clock limits based on your connection type (HDMI, DisplayPort, DVI) and will warn you if you exceed them .
2. GPU Compatibility & Pixel Clock Limits
CRU works across all three major GPU vendors:
- NVIDIA: Works with most GeForce cards. Note that very new GPUs (RTX 5000 series “Blackwell”) have different pixel clock behaviors (up to ~1620 MHz) and may require specific settings to bypass Display Stream Compression (DSC) .
- AMD/ATI: Fully supported. Older cards required a “Pixel Clock Patcher” to go beyond 165 MHz over DVI/HDMI .
- Intel: Supported with specific driver versions (e.g., 15.45 for Skylake/Kaby Lake, 15.40 for Haswell/Broadwell) .
It is important to know your hardware limits. For example, single-link DVI is capped at 165 MHz, while HDMI 2.0 can go up to 600 MHz .
3. FreeSync / VRR Range Editing
One of the hidden gems of CRU is the ability to edit FreeSync ranges. If your monitor supports FreeSync but flickers when the frame rate drops too low (e.g., below 48 FPS), you can use CRU to narrow the VRR range (e.g., change it from 48-144 Hz to 55-144 Hz) to stabilize the experience .
You can also add FreeSync support to monitors that technically have it disabled by default or enable G-SYNC compatibility on non-certified FreeSync displays when used with an NVIDIA GPU.
4. Removing Unwanted Resolutions (The “Cleanup” Tool)
Many users find their display settings cluttered with resolutions they will never use (e.g., 800×600 on a 4K monitor). CRU allows you to delete these “Standard Resolutions” and “Detailed Resolutions” . By cleaning up the list, you reduce clutter in the Windows display settings and NVIDIA/AMD control panels.
5. Extension Blocks (CEA-861, DisplayID, VTB-EXT)
Modern monitors require “Extension Blocks” to define high-resolution or high-refresh-rate modes. CRU fully supports:
- CTA-861 (formerly CEA-861): Used for HDMI devices to define audio capabilities, 3D formats, and video resolutions.
- DisplayID: A newer standard that supports resolutions larger than 4095×4095 and higher pixel clocks .
- VTB-EXT: Allows you to add more than the usual limit of standard resolutions.
For advanced users, editing these blocks is necessary to get things like 4K @ 144 Hz working properly.
6. Exporting & Reset Tools
Because messing up these settings can render your screen black, CRU comes with essential safety nets:
- restart.exe / restart64.exe: Restarts the graphics driver without rebooting the PC. If you mess up, you can often just run this to revert changes (though recovery mode exists).
- reset-all.exe: Completely removes all EDID overrides created by CRU and restores the default registry settings .
- Export to .exe: You can export your settings as a standalone installer. This is helpful for applying the same custom resolution setup to multiple computers without installing CRU on all of them .
System Requirements
CRU is extremely lightweight. If you have a Windows PC from the last 15 years, it will run.
How to Install and Use CRU (Step-by-Step)
Unlike traditional software, CRU is portable. You do not “install” it in the usual sense. However, using it correctly requires careful steps to avoid a black screen.
Step 1: Download the Utility
Download the latest stable version (1.5.3) from a trusted source like CNET or the official Monitor Tests forum . Extract the ZIP file to a folder (e.g., C:\CRU).
Step 2: Run CRU.exe
Navigate to the folder and double-click CRU.exe. Run it as Administrator to ensure it can write to the Registry. You will see a window with a list of your monitors.
Step 3: Select Your Monitor
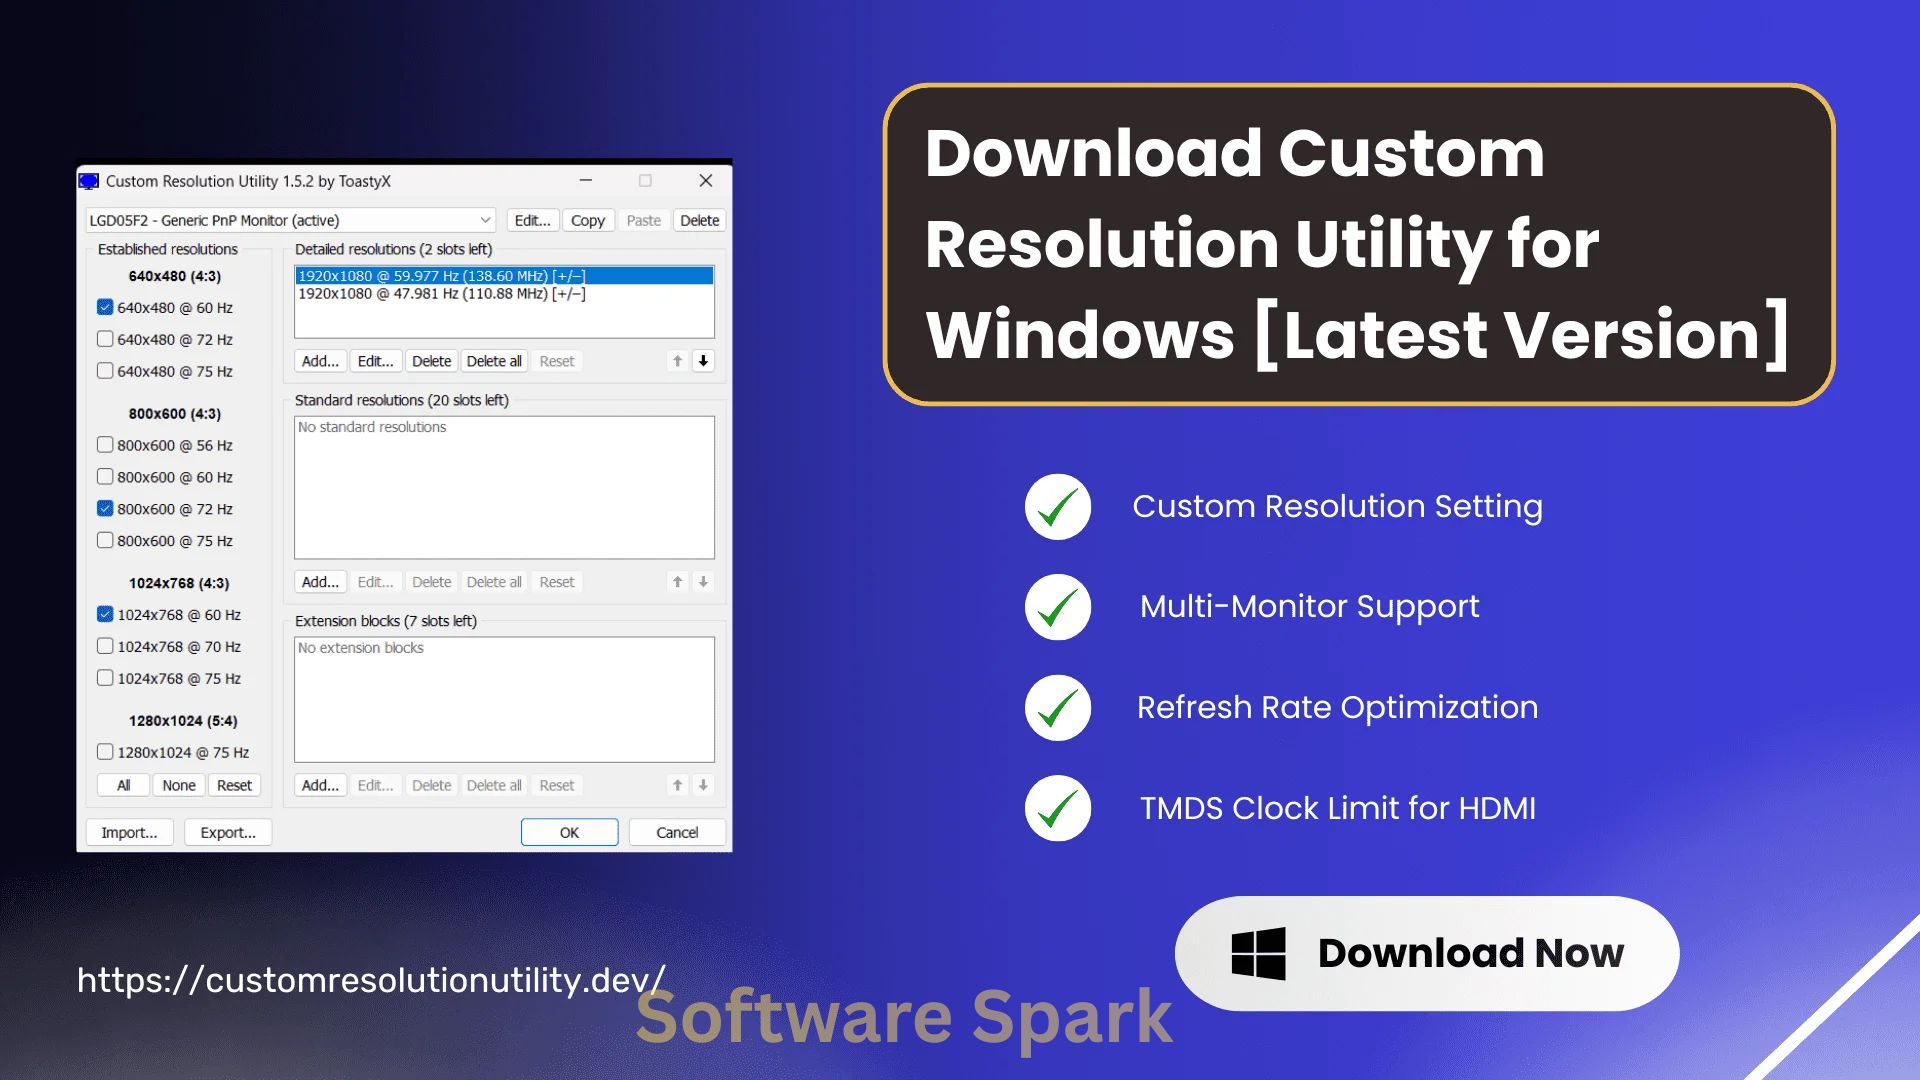
Use the drop-down box at the top. Select the monitor you want to modify. The window is divided into “Detailed resolutions” (top) and “Extension blocks” (bottom).
Step 4: Add a Custom Resolution (Example: 75 Hz)
- Under “Detailed resolutions,” click “Add…”
- In the new window, set the “Refresh rate” to 75.000 Hz.
- Leave “Timing” set to “Automatic – LCD standard” for most monitors.
- Click “OK.”
Step 5: (Optional) Remove Unwanted Resolutions
To clean up the list, click on any resolution listed (e.g., 1024×768) and click “Delete.” Be careful not to delete your native resolution.
Step 6: Save and Restart
Click “OK” to close the main CRU window. Navigate back to your CRU folder and run restart64.exe (if you have 64-bit Windows). This restarts the graphics driver.
Step 7: Verify the Change
Open Windows Settings > System > Display > Advanced Display. Check the refresh rate drop-down. Your new 75 Hz option should now appear.
Troubleshooting (Black Screen):
If your screen goes black during Step 6:
- Do not panic.
- Wait 15 seconds. CRU has a built-in recovery timer. Press F8 on your keyboard. This reverts the changes temporarily .
- If that fails, reboot into Safe Mode (mash F8 during boot). Once in Safe Mode, run
reset-all.exefrom your CRU folder to wipe all changes, then restart normally.
Pros and Cons Table
CRU is a specialized tool. It excels in some areas but falls short in others.
Practical Use Cases and Benefits
Use Case 1: The Competitive Gamer
Scenario: You play Valorant or CS2. You want to use a stretched resolution like 1440×1080 to make enemy models wider, but your monitor does not list it.
Benefit: You use CRU to add 1440×1080 as a custom resolution. You set the timing to “CVT-Reduced Blanking.” After restarting the driver, the resolution appears in your game settings. You get the competitive advantage you were looking for .
Use Case 2: The Monitor Overclocker
Scenario: You own a budget 60 Hz monitor. You have heard that some 60 Hz panels can be overclocked to 75 Hz.
Benefit: You add a 75 Hz resolution in CRU. You test it. If the screen artifacts or goes black, the recovery timer saves you. If it works, you enjoy 25% smoother motion in your daily desktop use and gaming—for free.
Use Case 3: The Flickering FreeSync Fixer
Scenario: You have a FreeSync monitor that flickers in games when the frame rate drops below 50 FPS (e.g., in game menus).
Benefit: You open CRU, click “Edit” on your monitor’s extension block, and find the “FreeSync range” entry. You change the minimum range from 48 to 55. The flickering stops because the monitor no longer tries to sync at unstable low frame rates .
Use Case 4: The Multi-Monitor Cleanup Artist
Scenario: You have three monitors connected. The Windows display settings list 50 different resolutions, most of which are useless (e.g., 720×480).
Benefit: You use CRU to delete all standard resolutions except 1920×1080 and 1280×720. Now, when you right-click the desktop to change resolution, you only see the options you actually use.
Use Case 5: The Legacy Compatibility Fixer
Scenario: You have an old software or game that only runs correctly at a specific, non-standard resolution (e.g., 1366×768), but your modern 4K monitor refuses to output it.
Benefit: You force-add that specific resolution via CRU. The GPU now thinks the monitor supports it natively, allowing the legacy program to display correctly without scaling artifacts.
Frequently Asked Questions (FAQ)
Q1: Is Custom Resolution Utility safe to use?
CRU is safe as long as you follow the recovery instructions. The utility modifies software registry keys, not the monitor’s firmware. If you set a refresh rate too high for your monitor to handle, the screen will go black, but pressing F8 within 15 seconds of applying the change will revert it . In the worst case, booting into Safe Mode and running reset-all.exe fixes everything.
Q2: Does CRU work with NVIDIA, AMD, and Intel?
Yes, but with caveats.
- NVIDIA & AMD: Excellent support. You may need a “Pixel Clock Patcher” for older AMD cards to unlock full potential .
- Intel: Supported, but you need specific driver versions (usually older ones like 15.45 for Skylake). Newer Intel Arc drivers have varying levels of compatibility .
Q3: Why is my custom resolution not showing up in games?
There are a few common reasons:
- You forgot to run
restart64.exeafter clicking “OK” in CRU. - The resolution exceeds your monitor’s pixel clock limit. Try using “LCD Reduced” timing to lower the pixel clock.
- GPU scaling is interfering. Go to your NVIDIA/AMD control panel and set “No Scaling” or “GPU Scaling” to troubleshoot.
Q4: Can I use CRU to enable HDR or change color bit depth?
No. CRU focuses on resolutions, refresh rates, and timings. It does not control color depth (8-bit vs 10-bit) or HDR metadata in a practical way. While you can edit HDR data blocks in extension blocks, it is extremely complex and rarely works to “unlock” HDR on a non-HDR monitor. Use your GPU control panel for color settings.
Q5: My settings reset after a Windows Update. Why?
Windows updates often reinstall or reset graphics drivers. Since CRU stores overrides in the registry tied to the driver, a driver reinstallation will clear those overrides. You will need to re-run CRU and apply your settings again. To speed this up, use the “Export” function in CRU to save your settings as a .exe file. After a Windows update, just run that .exe to re-apply everything .
Q6: What does “Pixel Clock” mean, and why am I hitting a limit?
The pixel clock is the speed at which the GPU sends pixels to the monitor. It is measured in MHz. Different cables have different limits:
- Single-Link DVI / HDMI 1.4: ~165 MHz (can be patched to 330+)
- Dual-Link DVI: ~330 MHz
- HDMI 2.0: ~600 MHz
If you try to set 4K at 144 Hz, you will blow past these limits and the setting will fail. You must reduce the resolution or refresh rate.
Q7: How do I reset everything if I am stuck on a black screen?
If you missed the F8 recovery window, follow these steps exactly:
- Turn off your PC by holding the power button.
- Turn it back on. As soon as Windows starts loading, hold the power button again to force shutdown. Do this twice.
- On the third boot, Windows will enter “Automatic Repair” mode.
- Go to Troubleshoot > Advanced Options > Startup Settings > Restart.
- Press 4 or F4 to boot into Safe Mode.
- Once in Safe Mode, navigate to your CRU folder and double-click reset-all.exe.
- Restart normally. Your monitors are back to factory defaults .
Conclusion
The Custom Resolution Utility (CRU) is a testament to the power of community-developed software. It fills a gap that the major GPU manufacturers have left open. If you are an enthusiast who feels limited by the default 60 Hz or the standard 1920×1080 resolution, CRU is your key to liberation.
It is not a tool for everyone. The interface is barebones, and the risk of a temporary black screen is real. But for those willing to spend an hour reading guides and understanding their monitor’s limits, the rewards are tangible. You can turn a cheap office monitor into a moderate gaming screen, force proper VRR ranges to stop flickering, or achieve the exact pixel-perfect aspect ratio required for competitive play.
Because CRU is free, portable, and actively maintained (with version 2.0 on the horizon), it remains the gold standard for EDID editing on Windows . Just remember the golden rules: start small, use the recovery timer, and respect your pixel clock limits.
If you are ready to take full control of your display, download the Custom Resolution Utility, backup your data (just in case), and start exploring the hidden potential of your monitor. You might be surprised at what your hardware can actually do.